
Salads
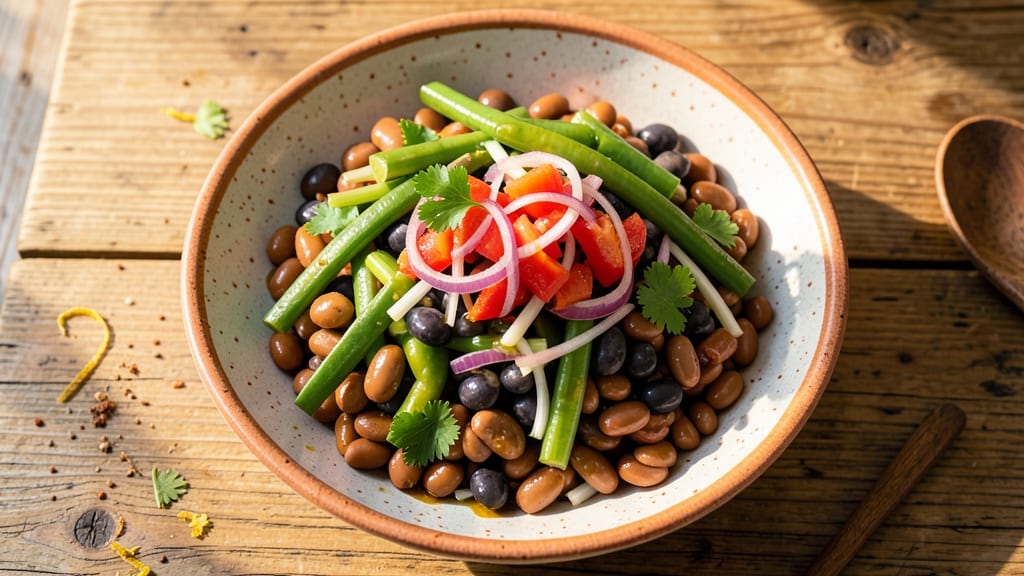
This traditional 3 bean salad recipe delivers the perfect balance of textures and flavors that have made it a picnic and potluck staple for generations. 💛 The classic combination of kidney beans, navy beans, and wax beans creates a hearty, protein-packed salad that's naturally vegetarian but satisfies everyone at the table.
What sets this version apart is the crisp celery crowns and sweet-savory dressing that elevate simple ingredients into something truly special.
The foundation of this salad lies in its ingredient ratios—equal parts kidney beans for earthy depth, navy beans for creaminess, and wax beans for a touch of sweetness. I've found that using high-quality canned beans (drained and rinsed) and dicing them uniformly creates the best texture.
The dressing, made with vinegar, oil, and a touch of sugar, binds everything together while enhancing the beans' natural flavors.
What you'll end up with is a salad that's as satisfying as it is versatile—crisp vegetables cut through the creamy beans, while the dressing adds just the right amount of tang. The celery crowns provide that signature crunch that makes every bite exciting.
This isn't just a side dish; it's a complete meal that holds up beautifully for hours, making it perfect for gatherings or meal prep.
For those who want to customize, you can easily add crispy bacon or diced ham for a meatier version, or keep it strictly vegetarian with extra herbs and a sprinkle of cheese.
The possibilities are endless, but the traditional version remains a crowd-pleaser that never disappoints. Here's how to make it perfectly every time.
Ingredients for traditional 3 bean salad
These simple, hearty ingredients transform into the ultimate picnic salad everyone loves.
| Ingredient | Amount | Notes |
|---|---|---|
| Kidney Beans 🌱 | 1 ½ cups | Drained, rinsed, high-quality canned |
| Navy Beans 🌱 | 1 ½ cups | Drained, rinsed, high-quality canned |
| Wax Beans 🌱 | 1 ½ cups | Drained, rinsed, high-quality canned |
| Red Onion 🧅 | 1 whole | Medium size, finely diced |
| Celery Stalk 🥬 | 4 whole | Fresh, crisp, cut into crowns |
| Red Bell Pepper 🌶️ | 1 whole | Medium, diced small |
| Extra-Virgin Olive Oil 🫒 | ½ cup | For dressing, fruity variety |
| White Vinegar 🍶 | ¼ cup | White or apple cider |
| Granulated Sugar 🍚 | 2 tbsp | For dressing balance |
| Salt 🧂 | 1 tsp | Kosher or sea salt |
| Black Pepper 🌶️ | ½ tsp | Freshly ground preferred |
| Fresh Parsley 🌿 | ¼ cup | Chopped, for garnish |
| Lemon Juice 🍋 | 1 tbsp | Freshly squeezed |
The beans are the star—Libby's or Bush's are my go-tos for quality, but any high-quality canned works. Drain and rinse them well to cut down on sodium. The celery crowns? Look for crisp, pale green stalks—avoid the yellowing ends. Red bell pepper adds that sweet crunch, but yellow or orange works too. If you're short on time, pre-cut veggies from the store save 15 minutes of chopping. Just make sure they're still crisp when you add them to the salad.
No red bell pepper? Green bell pepper or even a carrot works in a pinch. Short on vinegar? Lemon juice at double the amount gives a similar tang. The sugar in the dressing balances the acidity—honey or maple syrup are great swaps if you prefer. For extra crunch, add a handful of toasted pecans. And if you're worried about texture, pat the beans dry with a paper towel before mixing—they'll hold their shape better. The parsley is optional but adds that fresh finish.
This salad keeps beautifully. Store it in an airtight container for up to 5 days in the fridge. The flavors actually get better overnight as everything melds. For meal prep, I double the dressing and keep it separate until ready to serve—prevents soggy celery crowns. If you're making this for a crowd, prep the beans and dressing first, then toss everything together last minute. Trust me on this—it saves you from a mushy mess.
Why You'll Love This Recipe
- No-Cook Magic: I swear by this one—just toss the drained beans (kidney, navy, wax) with diced onion and celery, then a splash of vinegar and oil. Zero heat, zero fuss, and it still tastes like you slaved over it.
- Crunchy Contrast: That wax bean snap paired with creamy navy beans? It’s the best mouthful. I’ll be real: the red onion’s bite makes everything else sing, and I’ve never met a bean salad that didn’t benefit from it.
- Potluck Proven: Honestly, this is my go-to for gatherings—no one ever leaves with an empty plate. Serve it cold at picnics, pack it in lunches, or toss it into sandwiches. It’s the side dish that works for everything.
- Pantry Staple: Between us, this is the recipe that saved my grocery budget. Beans last forever, and the veggies? Basic. But the flavor? Ridiculously good. I make a double batch and eat it for days—no waste, all satisfaction.
Step-by-step instructions for traditional 3 bean salad
Here's how to make this classic, crunchy salad with perfect texture and flavor balance.
👨🍳 Step 1: Prepare the Bean Mixture
Drain and rinse the 1.5 cups kidney beans, 1.5 cups navy beans, and 1.5 cups wax beans thoroughly under cold water. I like to give them a quick shake in a colander to remove any excess moisture—this prevents a soggy salad later. Transfer them to a large mixing bowl and set aside.
Here's the thing—traditional 3 bean salad relies on the beans keeping their shape and bite. If you used canned beans with softeners, give them a quick rinse in ice water for 30 seconds to firm them up. Pat them dry with paper towels to remove any surface moisture that would make the dressing slide off.
🔪 Step 2: Chop the Vegetable Base
Finely dice the 1 whole red onion—I like mine small enough to eat without noticing, about ⅛-inch pieces. Cut the 4 whole celery stalks into crowns by slicing off the leafy tops and then making horizontal cuts every ½ inch down the stalk. This gives you those classic crunchy celery pieces.
For the 1 whole red bell pepper, remove the seeds and membranes, then dice it into small, even pieces. The key here is consistency—aim for pieces similar in size to your chopped onion. Toss all the chopped vegetables into the bowl with the beans and give everything a gentle mix with a wooden spoon.
🥘 Step 3: Make the Signature Dressing
In a small bowl, whisk together the 0.5 cup extra-virgin olive oil, 0.25 cup white vinegar, 2 tablespoons granulated sugar, 1 teaspoon salt, and 0.5 teaspoon black pepper. This is the sweet-savory balance that makes traditional 3 bean salad special. The sugar helps cut through the acidity of the vinegar while enhancing the beans' natural sweetness.
After whisking for about 30 seconds, stir in the 1 tablespoon lemon juice and 0.25 cup chopped fresh parsley. The parsley adds freshness that brightens the whole salad. Taste the dressing before pouring—it should be tangy but not overpowering, with just a hint of sweetness. Adjust with a pinch more sugar or salt if needed.
🍽️ Step 4: Combine and Chill for Perfect Texture
Pour the dressing over the bean and vegetable mixture, then gently toss everything together with your hands or a wooden spoon. The traditional method calls for mixing just until the ingredients are evenly coated—don't overwork it or you'll mash the beans. Let the salad sit at room temperature for 10 minutes to allow the flavors to meld.
After that initial rest time, transfer the salad to an airtight container and refrigerate for at least 2 hours (overnight is even better). This chilling time is crucial—it lets the beans absorb the dressing and develop that perfect tender-crisp texture. The longer it chills, the better the flavors will blend, but don't let it sit more than 24 hours or the celery will get too soft.
🍴 Step 5: Serve with Crunchy Perfection
Before serving, give the salad one final toss to redistribute any settled dressing. The traditional 3 bean salad should have a beautiful mix of colors—deep reds from the kidney beans, creamy whites from the navy beans, and bright green wax beans. The celery crowns should still have that satisfying crunch, while the onion and bell pepper add freshness with each bite.
I like to serve this salad at room temperature, which brings out all the flavors. It's perfect as a side dish for barbecues, picnics, or even as a light main course with some crusty bread. The secret to this classic recipe is patience—the chilling time makes all the difference in achieving that perfect texture and flavor balance that makes it so beloved.
Pro Tips For Making Traditional 3 Bean Salad
- Boil Beans Until Tender-Crisp: I learned this the hard way—overcooked beans turn to mush, and no one wants that in a salad. Aim for a fork-tender bite with just a hint of resistance, especially with kidney beans, which can get mealy fast. Drain them in a colander and rinse under cold water to stop the cooking—this also cools them down enough to handle.
- Slice Celery and Onion Thin: Thin, even slices make all the difference in texture. Use a sharp knife and cut the celery stalks lengthwise first, then slice them crosswise into ¼-inch pieces. For the red onion, slice it paper-thin—no need to peel, just trim the root end. This keeps the salad from feeling too heavy and lets the flavors blend better.
- Skip the Crowding in the Pot: I used to pack all the beans into one pot, thinking it’d cook faster. Wrong. Crowding steams them instead of boiling, leading to uneven cooking and a gummy texture. Cook them in batches if needed—just make sure the water covers them by at least an inch. A splash of vinegar or bay leaf in the water keeps them firm.
- Toss Wax Beans Raw: No need to boil the wax beans—just rinse them well and snap off the ends. Tossing them raw gives the salad a pleasant crunch that holds up for days. If you’re worried about bitterness, blanch them for 30 seconds in boiling water, then plunge into ice water. But honestly? Raw works just fine, and it’s one less step.
Perfect pairings for traditional 3 bean salad
Crunchy Bread Pairings
Traditional 3 bean salad pairs beautifully with crusty artisan bread that soaks up the tangy dressing. I love using a sourdough loaf from my local bakery—its chewy texture contrasts perfectly with the salad's firm beans.
For extra flair, try a garlic-herb focaccia with olive oil drizzled on top. The bread's saltiness complements the salad's sweet-savory balance, making every bite more satisfying. 🥖
Protein Additions
While this salad is vegetarian by tradition, it's incredibly versatile. For a meat lovers' version, add crispy bacon bits (about ½ cup) or diced ham (about ½ cup) for a Southern-style twist.
I also enjoy adding grilled chicken breast (about 1 cup diced) for a lighter protein boost. These additions work best when added just before serving to maintain the salad's crunch. 🍗
Cheese Complements
A sprinkle of sharp cheddar cheese (about ¼ cup crumbled) adds a creamy contrast to the crunchy beans. For a vegetarian option, try feta cheese (about ¼ cup crumbled) which provides a tangy kick.
I also like adding Parmesan cheese (about 2 tbsp grated) for a nutty finish. These cheeses should be added just before serving to prevent sogginess. 🧀
Drink Pairings
For a refreshing match, serve this salad with iced sweet tea—the Southern classic balances the salad's tangy dressing beautifully. Sparkling lemonade is another great option, especially during summer picnics.
If you prefer beer, a light lager like Miller Lite or Coors Light complements the salad's crisp vegetables without overpowering the flavors. 🍹
Seasonal Vegetable Swaps
In summer, swap the red bell pepper for cherry tomatoes (about 1 cup halved) for a juicier bite. During fall, add roasted butternut squash cubes (about 1 cup) for a sweet contrast.
Winter calls for pickled jalapeños (about 2 tbsp chopped) to add a spicy kick. These seasonal swaps keep the salad exciting year-round while maintaining its signature texture. 🍅
Dessert Follow-Ups
End your meal with a classic lemon bars to complement the salad's citrus notes. The bright, tangy dessert echoes the lemon juice in the dressing. For a lighter option, try fruit salad with berries and a honey-lime dressing.
These sweet finishes balance the salad's savory flavors beautifully, creating a well-rounded meal. 🍋
Nutrition facts
Frequently asked questions
Can I use dried beans instead of canned?
Yes, but you'll need to soak them overnight first! For every 1.5 cups of dried beans, soak in water for 8-12 hours, then boil for 1-1.5 hours until tender. Dried beans have a denser texture than canned, so they'll need extra time to soften properly. Just be sure to rinse them thoroughly before mixing to remove any excess starch.
Why does my 3 bean salad get soggy?
Sogginess happens when beans absorb too much dressing or moisture. To fix this, pat the beans dry with paper towels before mixing and keep dressing separate until serving. Also, store in an airtight container with a paper towel on top to absorb excess moisture. The celery crowns should stay crisp for 24 hours if stored properly.
What's the best way to make this gluten-free?
This recipe is naturally gluten-free! Just ensure your canned beans have no added wheat or barley. For extra safety, check the labels on vinegar and dressings. The traditional ingredients like beans, vegetables, and olive oil are all gluten-free. If you're serving with bread, choose gluten-free sourdough or baguettes.
Can I make this ahead of time?
This salad actually tastes better after 24 hours as flavors meld. Store in an airtight container in the fridge. Keep the dressing separate until serving to maintain crispness. For meal prep, I recommend assembling everything except the dressing, then adding it just before eating. The beans will absorb the dressing perfectly after chilling.
What's the secret to perfect celery crowns?
Use fresh, crisp celery with pale green stalks (avoid yellowing ends). Cut into ½-inch slices and store in the fridge in a sealed container with a paper towel to absorb moisture. For extra crunch, add a ¼ tsp baking soda to the ice water when rinsing beans—it helps preserve texture! The key is timing: add celery last and serve within 24 hours for best results.