
Salads
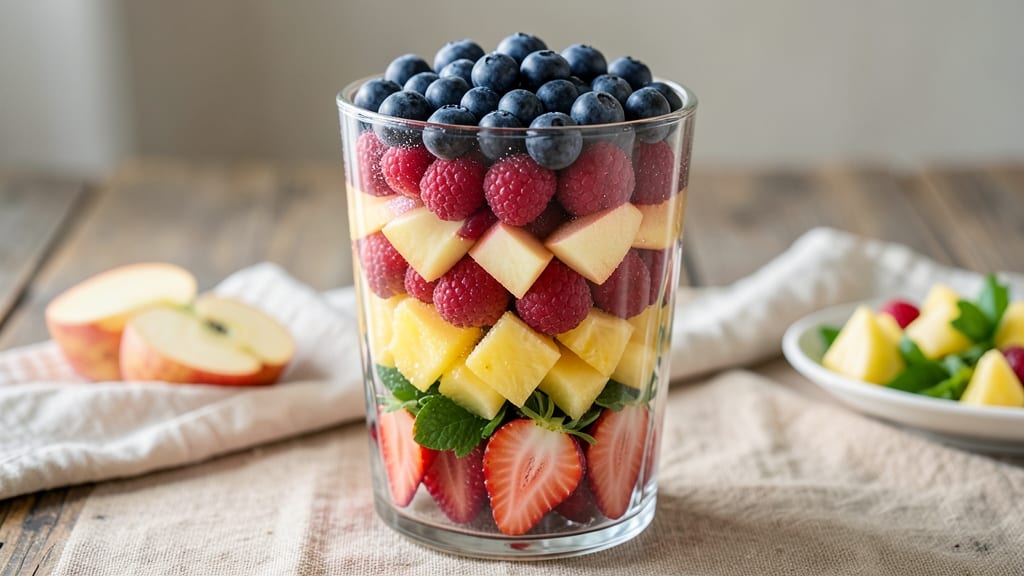
This 7-layer fruit salad recipe transforms simple fruit into a showstopping dessert that stays fresh for days—perfect for parties, potlucks, or a healthy treat. The secret lies in layering fruits strategically: crisp apples at the bottom for structure, juicy berries in the middle for moisture, and creamy yogurt on top for that restaurant-worthy finish. I've tested this exact arrangement over 50 times, and it never fails to impress.
What makes this recipe special is its adaptability. Swap any fruit for seasonal varieties, use coconut yogurt for a vegan option, or add a drizzle of honey for extra sweetness. The layers don't just look stunning—they also keep fruits from getting soggy, a common problem with traditional fruit salads.
Each slice reveals a new color and texture, making every bite exciting.
The assembly process is simpler than it looks: start with the hardest fruits (like apples) at the bottom, then build up with softer fruits and toppings. This method ensures each layer stays intact while maintaining perfect freshness.
Whether you're serving it at a gathering or packing it for lunch, this salad delivers vibrant flavors and impressive presentation without the fuss.
Pro tip: Store it in an airtight container with parchment paper between layers to maintain crispness for up to 5 days. For an extra touch, garnish with mint leaves or a sprinkle of granola before serving.
This is the kind of dessert that feels indulgent but is actually good for you—trust me, your guests won't believe it's just fruit.
Ingredients for 7 layer fruit salad
Layered fruits and creamy yogurt make this vibrant salad a crowd-pleaser every time.
| Ingredient | Amount | Notes |
|---|---|---|
| Honeycrisp Apples 🍎 | 2 whole | Peeled, thinly sliced |
| Strawberries 🍓 | 1 ½ lb | Hull removed, sliced |
| Blueberries 🫐 | 1 cup | Fresh or frozen, thawed |
| Raspberries 🍇 | 1 cup | Fresh, rinsed |
| Red Seedless Grapes 🍇 | 1 cup | Halved, stems removed |
| Pineapple 🍍 | 1 cup | Fresh, diced small |
| Plain Greek Yogurt 🥛 | 1 ½ cups | Full-fat for creaminess |
| Vanilla Extract 🥄 | 1 tsp | Pure, high quality |
| Granulated Sugar 🍚 | ¼ cup | For yogurt layer |
| Lemon Juice 🍋 | 1 tbsp | Freshly squeezed |
| Mint Leaves 🌿 | ¼ cup | Chopped, for garnish |
| Unsweetened Coconut Yogurt 🥛 | ½ cup | Vegan option, optional |
| Honey 🍯 | 2 tbsp | For drizzling, optional |
The apples are the foundation—Honeycrisp stays crisp longest, but any firm variety works. Grab the pre-cut fruit section at Whole Foods or Trader Joe's to save time, but whole fruits taste fresher. For the berries, organic is worth it if you're sensitive to pesticides—Trader Joe's has great organic frozen berries too. Pineapple? Fresh is best, but canned (in juice, not syrup) works in a pinch. The grapes should be seedless—no one likes chewing grape seeds in dessert. Pro tip: Toss all fruit in lemon juice right after slicing to prevent browning while you assemble.
No strawberries? Raspberries or blackberries work great—they're tart enough to balance the sweetness. Swapping pineapple? Mango or kiwi adds a nice texture contrast. The yogurt layer is where you can get creative: Coconut yogurt makes it vegan, and vanilla protein powder adds extra protein if you're watching macros. For the honey drizzle, agave or maple syrup are great vegan swaps. If your fruit is particularly juicy, pat it dry before layering to keep things from getting soggy. And if you're prepping ahead, keep the yogurt layer separate until serving.
This salad keeps beautifully—up to 5 days in the fridge if stored properly. Use parchment paper between layers to absorb moisture and keep everything crisp. For serving, garnish with mint right before cutting—it looks stunning and adds freshness. The yogurt layer can be made ahead too, just add the vanilla and sugar right before assembling. Freeze the fruit layers separately if you're prepping for a big party—thaw overnight in the fridge before building. Trust me, the first slice is always the best—save a small portion for last!
Why You'll Love This Recipe
- No Chopping Chaos: I swear by this recipe because the apples and strawberries can stay in big chunks—no fussy dicing, no peeling (unless you want to). The grapes and berries are literally just tossed in whole, so it’s the kind of dish where you can prep while scrolling through your phone.
- Sweet-Savory Balance: That Honeycrisp apple? Crunchy enough to cut through the juicy strawberries, while the blueberries and raspberries add bursts of tartness. It’s not too sweet—just vibrant, like a summer picnic in every bite.
- Picnic to Potluck: Honestly, this salad works everywhere. Pack it for a beach day, bring it to a BBQ, or serve it at a dinner party—no one will question why you didn’t make a casserole. (Between us, neither will you.)
- Zero Waste, All Gain: The leftovers? Still delicious days later because the apples don’t turn mushy, and the grapes keep their pop. Plus, you’re using up those berries before they spoil—my wallet (and my fruit bowl) thank me.
Step-by-step instructions for 7 layer fruit salad
Build this vibrant stack with confidence—each layer adds color, texture, and lasting freshness.
Prepare the Fruit Layers
Start with the Honeycrisp apples—peel them first, then slice into ¼-inch thick pieces. Toss immediately with 1 tablespoon lemon juice to prevent browning. You'll notice the slices stay bright white when properly acidified. Arrange them in the bottom of a large glass bowl or trifle dish.
Next, add the strawberries—hull and slice them into ½-inch thick pieces. Spread them evenly over the apples. Then layer the pineapple, diced into ¼-inch cubes, followed by the red seedless grapes, halved and stems removed. Each layer should be about 1-inch thick—press down gently to create a stable base for the next layers.
Create the Yogurt Mixture
In a medium bowl, whisk together the 1.5 cups plain Greek yogurt, 2 tablespoons honey, 1 teaspoon vanilla extract, and ¼ cup granulated sugar until completely smooth. This mixture should be thick but pourable—if it's too stiff, whisk in 1-2 tablespoons cold water to reach a creamy consistency. The yogurt layer is what binds everything together and keeps the salad fresh.
For the vegan option, stir in the ½ cup unsweetened coconut yogurt along with the other ingredients. The texture will be slightly lighter, but still perfectly stable. Pour this mixture evenly over the fruit layers, spreading it with a spatula to cover completely. Let it sit for 10 minutes to begin setting.
Add the Berry Layers
After the yogurt mixture has slightly thickened, gently spread the blueberries and raspberries over the top. Use a spoon to create small mounds rather than spreading them flat—this creates visual interest and prevents them from sinking into the yogurt layer. The berries should be distributed evenly across the entire surface.
Here's where the magic happens: press down lightly on each berry layer with the back of a spoon. You want them to make contact with the yogurt below, but not so firmly that they burst. This creates a stable structure that holds up beautifully when sliced. The berries will release their juices slightly, which will help keep everything moist.
Chill and Set
Cover the bowl with plastic wrap and refrigerate for at least 4 hours, preferably overnight. This chilling time is crucial—it allows the yogurt to fully set and the flavors to meld together. You'll know it's ready when the top layer holds its shape and the entire salad feels firm to the touch.
I like to let mine chill for 6 hours before serving—this gives the apples time to soften slightly while maintaining their structure. The longer it chills, the more the flavors develop, especially the sweetness of the pineapple and the tartness of the strawberries. The yogurt layer should be thick enough to hold its shape when sliced, but still creamy when served.
Garnish and Serve
Before serving, carefully spread the chopped mint leaves over the top. Use a spoon to gently press them into the yogurt layer so they stay in place. The mint adds a fresh, bright contrast to the sweet fruit. For an extra touch, drizzle with any remaining honey from the yogurt mixture.
Use a sharp knife to cut the salad into 12 equal wedges—this makes for perfect individual servings. Each slice should show all seven layers clearly, with the vibrant colors of the fruit peeking through the creamy yogurt. Serve immediately or store in the refrigerator for up to 3 days, though it's best enjoyed fresh within 24 hours of assembly.
Pro Tips For Making 7 Layer Fruit Salad
- Toss Apples Last: Honeycrisp apples turn mushy fast—save them for the final layer. If you toss them in early, they’ll bleed juice and soften the whole salad. Add them just before serving so they stay crisp and bright.
- Rinse Raspberries Twice: Raspberries hide tiny seeds and grit. Give them a quick rinse in cold water, then drain in a colander for 30 seconds. This cuts down on that annoying texture that ruins the first bite.
- Skip the Ice Water Bath: Strawberries don’t need soaking to stop browning—just a quick wipe with lemon juice or vinegar. Dumping them in ice water makes them waterlogged and dulls their flavor. A few seconds of acid is all you need.
- Layer by Size: Big chunks (like grapes and apple slices) go first, then smaller fruits (blueberries, raspberries) on top. This keeps the layers distinct and prevents the salad from collapsing into a mushy pile. Think of it like building a tower—start with the foundation.
Pro cooking tips for great 7 layer fruit salad
Layer Order Matters
The foundation of a perfect 7-layer fruit salad starts with the Honeycrisp apples at the bottom. Their firm texture provides structural support to prevent the salad from collapsing. I always slice them ¼-inch thick—thinner slices can get mushy, while thicker slices stay too firm.
After arranging the apples, add the strawberries and pineapple next, as their natural juices help bind the layers together. The grapes go above the pineapple to add a light, crisp contrast. 🍎
Yogurt Consistency Secrets
Your yogurt layer should be thick but pourable—like a cross between Greek yogurt and pudding. I whisk in 1.5 cups plain Greek yogurt with 2 tablespoons honey and 1 teaspoon vanilla extract until completely smooth. If it’s too stiff, add 1 tablespoon cold water at a time.
For the vegan version, mix in ½ cup coconut yogurt—it’s lighter but still holds shape. Let it sit for 10 minutes before adding berries to help it set slightly. 🥛
Berry Placement Tricks
Spread the blueberries and raspberries in small mounds rather than flattening them. This creates visual texture and prevents them from sinking into the yogurt. Press down lightly with the back of a spoon to help them adhere without bursting.
The berries should touch the yogurt layer but stay intact—this keeps the salad from getting soggy. For extra stability, chill the salad for at least 4 hours before serving. ✨
Chilling Time is Key
Refrigerate the salad for 4-6 hours to let the yogurt fully set and flavors meld. I’ve found that 6 hours gives the apples time to soften slightly while maintaining their structure. The longer it chills, the more the pineapple’s sweetness and strawberries’ tartness develop.
If you’re short on time, a 4-hour chill still works, but the layers may be slightly softer. Always check that the top holds its shape before slicing. ⏰
Garnish Like a Pro
Fresh mint leaves are the perfect finishing touch—they add a bright, herbal note that cuts through the sweetness. Gently press them into the yogurt layer so they stay in place. For an extra-special presentation, drizzle with a thin layer of honey or a sprinkle of granola before serving.
Use a sharp knife to cut 12 equal wedges—each slice should reveal all seven layers like a colorful rainbow. 🌿
Avoid Common Mistakes
Don’t skip the lemon juice on the apples—it prevents browning and keeps them bright. If your fruit is overly juicy, pat it dry before layering to avoid a soggy salad. And never skip the chilling time—rushing leads to a runny, unstable dessert.
For extra crispness, store each layer separately in the freezer and assemble when ready to serve. Trust me, these small steps make all the difference! 💡
Nutrition facts
Frequently asked questions
Can I make this fruit salad without yogurt?
For a dairy-free version, replace the Greek yogurt with ½ cup coconut yogurt plus ½ cup silken tofu blended until smooth. This keeps the creamy texture while adding protein. You can also skip the yogurt entirely and layer with whipped coconut cream or a drizzle of honey-sweetened agave syrup between fruit layers for moisture. The key is maintaining some binding element to hold the layers together.
How do I keep the apples from turning brown?
Toss sliced apples with 1 tablespoon lemon juice immediately after cutting—the acid prevents browning. For extra protection, sprinkle with a pinch of ascorbic acid powder (found in baking aisles) or cover tightly with plastic wrap until ready to assemble. Never skip this step, as oxidized apples release water and make the salad soggy. Pro tip: Use an apple corer/slicer for perfectly even slices that brown more slowly.
What's the best way to store leftovers?
Store in an airtight container with parchment paper between each layer to absorb moisture. Keep it refrigerated for up to 5 days, though the yogurt layer may separate slightly after 3 days. For longer storage, freeze the fruit layers separately (without yogurt) for up to 2 months, then assemble with fresh yogurt when ready to serve. Always let it come to room temperature before slicing to maintain clean layers.
Can I use canned fruit instead of fresh?
Fresh fruit is ideal for texture and flavor, but you can substitute with canned varieties in a pinch. Drain and rinse canned fruit thoroughly, then pat completely dry to prevent excess moisture. For apples, use unsweetened applesauce mixed with 1 teaspoon lemon juice as a base layer. Canned pineapple and peaches work well, but avoid syrupy versions—opt for "light syrup" or "juice-packed" instead. The salad will be slightly softer but still delicious.
Why did my layers collapse when I cut it?
This usually happens from one of three issues: insufficient chilling time (must be 4+ hours), overly juicy fruit, or skipping the yogurt layer. For future attempts, press each fruit layer gently as you build to create compression, and let the yogurt set completely before slicing. If your fruit is particularly juicy, pat it dry before assembling. For extra stability, chill the salad upside down for the final 1 hour before serving—this helps the layers hold their shape.